

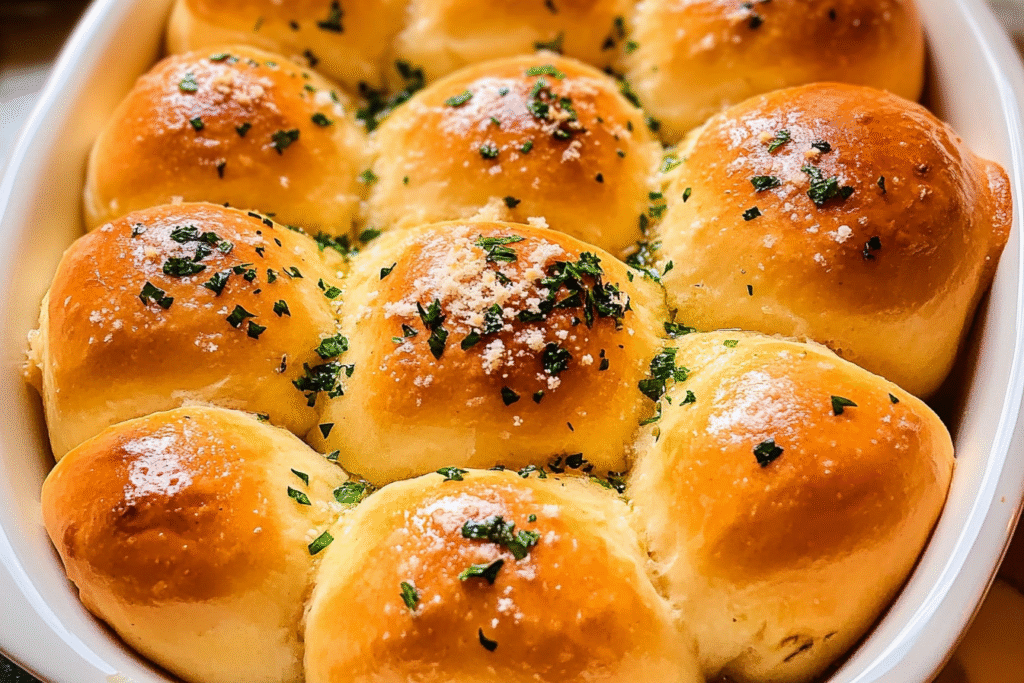
Few things feel as comforting as the smell of fresh bread baking in the oven. Garlic Butter Bread Rolls take that comfort up a notch, pairing soft, fluffy dough with a golden crust brushed in rich garlic butter. They’re warm, inviting, and turn any meal—whether it’s a family dinner, holiday spread, or cozy night in—into something memorable.
What makes these rolls special is their simplicity. With a handful of pantry staples, a little patience, and no fancy equipment, you can create bakery-quality bread right in your own kitchen. They’re versatile too: perfect alongside pasta, soups, roasts, or served on their own with extra butter.
Homemade rolls are more than food—they’re an experience. From kneading the dough to watching it rise and brushing on that glossy garlic butter finish, every step is rewarding. And when you finally pull them from the oven, the aroma alone will have everyone rushing to the table.
Why You’ll Love This Garlic Butter Bread Rolls
Garlic Butter Bread Rolls aren’t just delicious—they’re the kind of recipe you’ll come back to again and again. Soft and airy on the inside, lightly crisp on the outside, and loaded with buttery garlic flavor, they’re everything you want in a dinner roll.
You’ll love their versatility. They pair perfectly with hearty soups, pasta dinners, and festive holiday meals, yet they’re easy enough to whip up on a weeknight. Leftovers (if you have any) can be reheated, turned into sliders, or frozen for later.
The recipe is approachable for beginners too. With simple steps and no need for special tools, you’ll feel confident making them from scratch. And let’s be honest—the smell of garlic and butter baking into fresh bread is reason enough to try them.
What You’ll Need
To make Garlic Butter Bread Rolls, you only need a few pantry staples and some fresh ingredients for the flavor. Here’s everything required:
For the Dough:
- 3 ½ cups all-purpose flour
- 2 ¼ tsp instant yeast (1 packet)
- 1 cup warm milk (about 110°F)
- 2 tbsp sugar
- 1 tsp salt
- 1 large egg
- 4 tbsp unsalted butter, softened
For the Garlic Butter Topping:
- 4 tbsp unsalted butter, melted
- 3 cloves garlic, minced (or 1 tsp garlic powder)
- 1 tbsp fresh parsley, chopped (optional)
- Pinch of salt
That’s it—no complicated ingredients, just simple basics that transform into the softest, most flavorful rolls.
How to Make Garlic Butter Bread Rolls
- Activate Yeast
In a mixing bowl, combine warm milk, sugar, and yeast. Let it sit for 5–10 minutes until foamy. - Make the Dough
Add softened butter, egg, and salt. Mix in the flour gradually until a soft dough forms. Knead for 8–10 minutes until smooth and elastic. - First Rise
Place the dough in a greased bowl, cover, and let rise for 1–1.5 hours, or until doubled in size. - Shape Rolls
Punch down the dough and divide into 12–15 equal pieces. Shape into balls and arrange on a greased baking dish or lined sheet pan. - Second Rise
Cover and let rest for 30–40 minutes until puffy. - Bake
Preheat oven to 375°F (190°C). Bake rolls for 18–20 minutes, until golden brown. - Garlic Butter Glaze
Mix melted butter with garlic, parsley, and a pinch of salt. Brush generously over warm rolls right out of the oven.
The result: soft, golden rolls that smell and taste like heaven.
You Must Know
Before diving into this recipe, there are a few key things to keep in mind for success:
- Yeast Matters: Always check the expiration date. If your yeast doesn’t foam during activation, start over with fresh yeast.
- Warm, Not Hot Milk: Milk should be warm to the touch (around 110°F). Too hot will kill the yeast, too cold will slow the rise.
- Soft Dough is Good: The dough should be slightly sticky at first. Resist the urge to add too much extra flour, or your rolls may turn dense.
- Rising Time Varies: Dough rises faster in a warm kitchen and slower in cooler temperatures. Be patient and let it double in size rather than sticking strictly to the clock.
- Don’t Skip the Butter Glaze: Brushing the rolls while they’re hot lets the garlic butter soak in for maximum flavor.
Keeping these small details in mind ensures light, fluffy rolls every time.
Perfecting the Cooking Process
Making Garlic Butter Bread Rolls is simple, but perfecting them comes down to technique:
- Kneading: Knead until the dough passes the “windowpane test”—stretch a small piece, and if it becomes thin without tearing, it’s ready. This ensures elasticity and softness.
- Shaping: For uniform rolls, weigh each dough ball so they bake evenly. It makes a big difference in presentation.
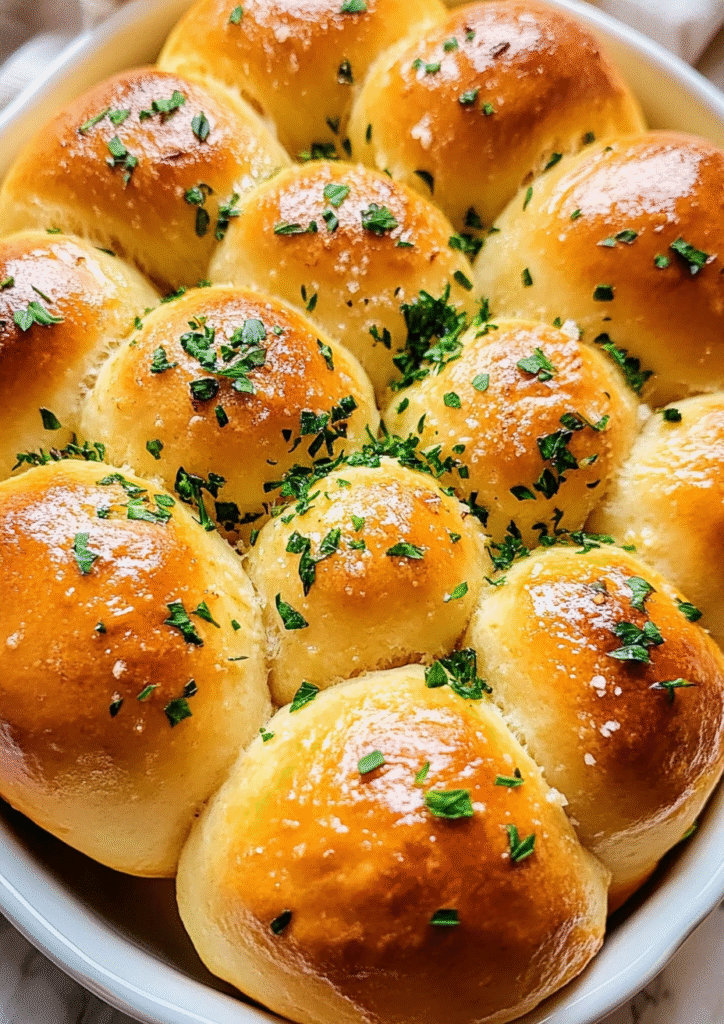
- Pan Choice: Rolls baked close together in a dish will be softer and “pull-apart” style. Rolls baked spaced out on a sheet pan will have more crust.
- Baking: Rotate the pan halfway through to avoid uneven browning. Watch closely near the end—golden brown is perfect, too dark dries them out.
- Finishing Touch: For extra shine, brush with garlic butter once, let them sit 5 minutes, then brush again before serving.
With these steps, your rolls will look bakery-worthy and taste even better.
Add Your Touch Garlic Butter Bread Rolls
One of the best parts about Garlic Butter Bread Rolls is how easy it is to customize them:
- Cheesy Upgrade: Sprinkle shredded mozzarella, cheddar, or parmesan on top before baking for cheesy garlic rolls.
- Herb Variations: Mix in dried Italian seasoning, rosemary, or thyme with the butter glaze for extra flavor.
- Stuffed Rolls: Place a small cube of cheese inside each dough ball before baking for a gooey surprise.
- Spicy Twist: Add a pinch of chili flakes or smoked paprika to the garlic butter for a subtle heat.
- Whole Wheat Option: Swap half the flour with whole wheat for a slightly denser but wholesome version.
These little tweaks let you adapt the rolls to match your meal or personal taste, while keeping the base recipe simple and reliable.
Storing & Reheating
These rolls are best fresh, but they store well too:
Explore our most popular comfort foods.
- At Room Temperature: Keep in an airtight container or wrapped in foil for up to 2 days.
- In the Refrigerator: Store up to 5 days. Warm slightly before serving to bring back softness.
- Freezing: Freeze baked rolls in a sealed bag for up to 2 months. Thaw at room temperature, then reheat.
- Reheating: Wrap rolls in foil and warm in the oven at 300°F (150°C) for 8–10 minutes. For a quick option, microwave for 20–30 seconds, then brush lightly with melted butter.
Pro tip: Reheat with a fresh brush of garlic butter to revive that just-baked taste.
Chef’s Helpful Tips for Garlic Butter Bread Rolls
Pair this with one of our simple sides.
- Use Bread Flour for Extra Softness: While all-purpose flour works perfectly, bread flour can give rolls an even fluffier texture.
- Don’t Rush Rising: Letting the dough fully double in size is key. If under-proofed, the rolls may turn dense instead of airy.
- Butter Temperature: Use softened butter in the dough for easy mixing, and melted butter for glazing to ensure even coating.
- Egg Wash Option: Brush the tops with a light egg wash before baking for a deeper golden shine.
- Double the Batch: These rolls vanish fast—consider making two trays if serving guests.
- Serve Warm: Garlic butter is most aromatic and flavorful when brushed onto warm rolls right after baking.
These little adjustments and tricks make your rolls foolproof and restaurant-quality every time.
FAQ for Garlic Butter Bread Rolls
Q: Can I make the dough ahead of time?
Yes. Prepare the dough, let it rise once, shape into rolls, then refrigerate overnight. Let them come to room temperature and rise again before baking.
Try these cozy dinner ideas next.
Q: Can I use garlic powder instead of fresh garlic?
Absolutely. About 1 teaspoon of garlic powder equals 2–3 cloves fresh garlic. It’s a great shortcut.
Q: How do I keep the rolls soft?
Store in an airtight container or wrap tightly in foil. Avoid leaving them uncovered—they’ll dry out quickly.
Q: Can I make these without eggs?
Yes, replace the egg with 2 tablespoons of plain yogurt or extra milk. The rolls will still be fluffy.
Q: Do I need a stand mixer?
No. This recipe works just as well kneading by hand—it only takes about 8–10 minutes of kneading for great results.
Conclusion
Garlic Butter Bread Rolls are soft, fluffy, and brushed with rich garlic butter—simple yet irresistible. They’re easy to make, pair well with any meal, and can be customized with cheese, herbs, or spices.
Whether for a weeknight dinner or a holiday feast, these homemade rolls bring warmth and comfort to the table. Once you try them, they’ll quickly become a family favorite.
How to Make Garlic Butter Bread Rolls (Step-by-Step Guide)
Description
Soft, fluffy homemade bread rolls brushed with rich garlic butter. Easy to make, delicious with any meal, and perfect for sharing.
Ingredients
Instructions
Mix warm milk, sugar, and yeast. Let sit until foamy.
Add egg, butter, salt, and flour. Knead into a smooth dough.
Cover and let rise until doubled (about 1 hr).
Shape into balls, place on a baking pan, and rise again (30 mins).
Bake at 375°F (190°C) for 18–20 minutes, until golden.
Brush hot rolls with garlic butter and serve warm.
Notes
- For softer rolls, bake close together in a dish.
Use garlic powder if fresh garlic isn’t available.
Freeze leftovers for up to 2 months.