
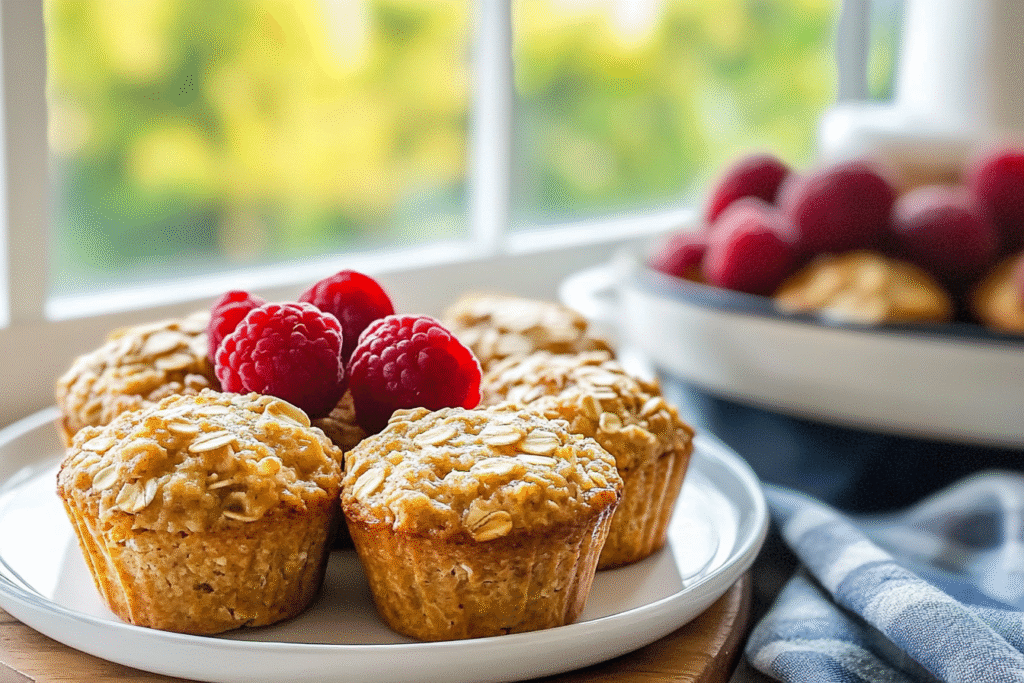
Mornings during the back-to-school season can be chaotic, which is why these Delicious Back-to-School Baked Oatmeal Cups are the perfect solution. Easy to make, kid-approved, and packed with wholesome ingredients, they take the stress out of weekday breakfasts.
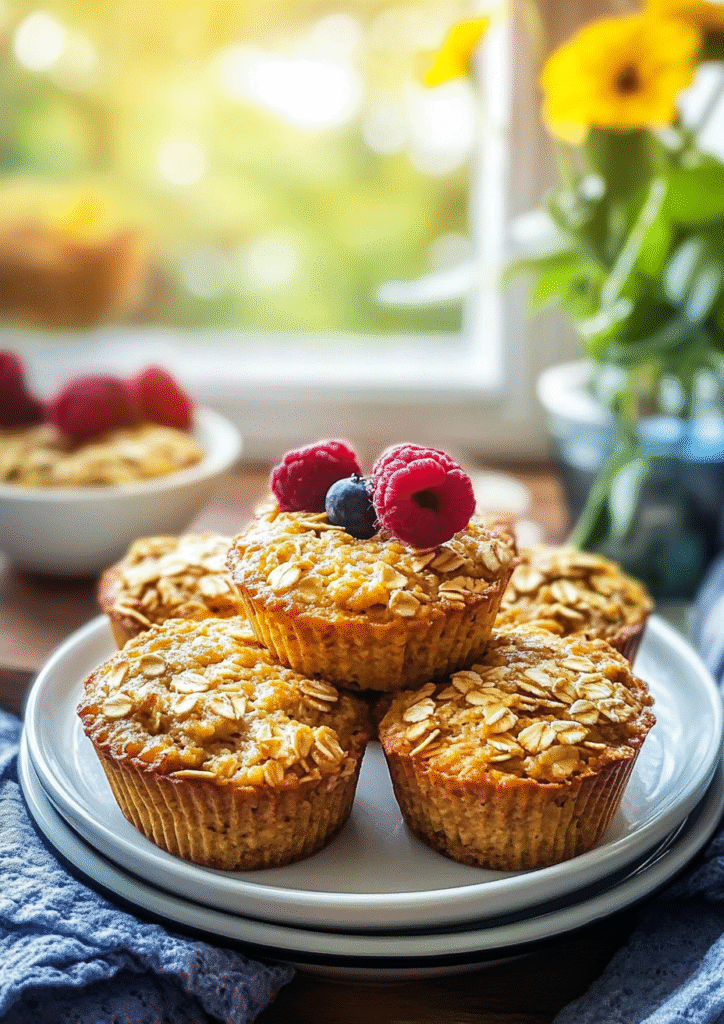
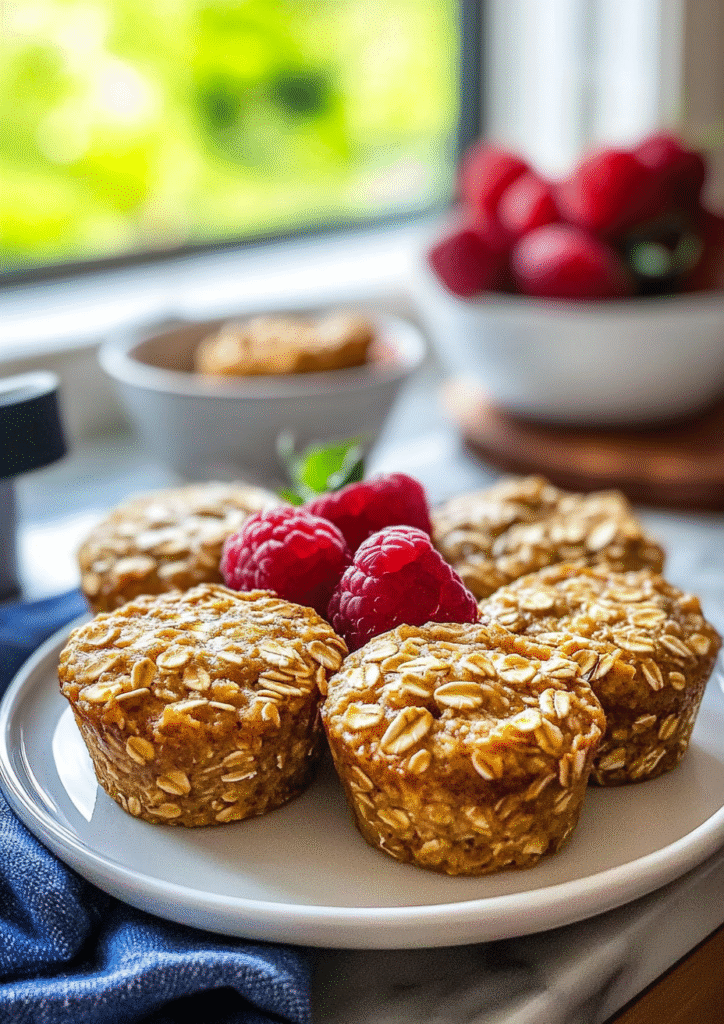
These oatmeal cups are individually portioned, freezer-friendly, and made with simple pantry staples like oats, bananas, and maple syrup. They’re quick to grab on the go and can be customized with your favorite mix-ins like berries, chocolate chips, or nuts.
Whether you’re a busy parent or a student rushing out the door, this recipe brings balance, flavor, and nutrition to your morning routine. One bake—multiple servings for the week. Breakfast made easy!
Why You’ll Love This Back-to-School Baked Oatmeal Cups
These baked oatmeal cups check all the boxes: they’re healthy, convenient, customizable, and totally delicious. Make a batch on Sunday and enjoy stress-free mornings all week long.
You’ll love how flexible they are—use whatever fruits or flavors your family enjoys. They’re naturally sweetened and made with whole oats, so they provide long-lasting energy without the sugar crash.
Perfect for school lunches, after-school snacks, or a quick bite before class, these oatmeal cups are a family favorite. Plus, kids can help choose toppings or stir the batter, making breakfast prep fun and interactive.
What You’ll Need
This recipe keeps it simple with wholesome, pantry-friendly ingredients. You probably already have most of them on hand. Here’s what you’ll need to make a batch of delicious baked oatmeal cups:
Dry Ingredients:
- 2 cups old-fashioned rolled oats – The base of your oatmeal cups; avoid quick oats for best texture.
- 1 tsp baking powder – Helps the cups rise slightly and hold shape.
- 1 tsp cinnamon – Adds warmth and flavor.
- ¼ tsp salt – Balances sweetness and enhances overall taste.
Wet Ingredients:
- 2 ripe bananas (mashed) – Natural sweetness and moisture.
- 2 large eggs – For binding.
- 1 cup milk – Dairy or non-dairy (like almond or oat milk).
- ¼ cup maple syrup or honey – Natural sweetener (use honey only for kids over 1 year).
- 1 tsp vanilla extract – Adds flavor depth.
- ¼ cup unsweetened applesauce – Adds moisture and subtle sweetness.
Optional Add-Ins:
- Fresh or dried berries
- Mini chocolate chips
- Chopped nuts or seeds
- Shredded coconut
- Swirls of peanut or almond butter
Mix and match your favorites—every batch can be unique!
How to Make Back-to-School Baked Oatmeal Cups
Making baked oatmeal cups is super easy. Here’s how to do it step by step:
Step-by-Step Instructions:
- Preheat your oven to 350°F (175°C). Line a muffin tin with silicone or paper liners.
- In a large bowl, mash 2 ripe bananas until smooth.
- Whisk in:
- 2 large eggs
- 1 cup milk (any kind)
- ¼ cup maple syrup
- 1 tsp vanilla extract
- ¼ cup applesauce
- Stir in:
- 2 cups rolled oats
- 1 tsp baking powder
- 1 tsp cinnamon
- ¼ tsp salt
- Gently fold in your chosen mix-ins (about ½ cup total).
- Scoop the mixture into prepared muffin cups, filling each about ¾ full.
- Bake for 22–25 minutes, or until tops are firm and lightly golden.
- Cool for 5–10 minutes in the pan, then transfer to a wire rack.
Enjoy warm or let them cool completely before storing. These are perfect for breakfast or snack time—no fork needed!
You Must Know
Before you whip up a batch of these baked oatmeal cups, here are a few must-know tips to make your recipe a success every time:
1. Use ripe bananas. The riper, the better—they add natural sweetness and help hold the batter together. Spotty bananas are perfect.
2. Don’t skip the liners. Whether you’re using paper or silicone muffin liners, they make cleanup a breeze and help keep the cups from sticking to the pan.
3. Oats matter. Always use old-fashioned rolled oats. Quick oats may turn out mushy, and steel-cut oats won’t cook through properly.
4. Let them rest. After baking, give the oatmeal cups time to cool in the pan for 5–10 minutes. This helps them set and makes them easier to remove without falling apart.
5. Customize smartly. Add mix-ins like berries, nuts, or chocolate chips after the base batter is mixed. This keeps textures balanced and prevents sinking.
6. Keep them kid-friendly. Want less mess? Skip sticky toppings or go with finely chopped ingredients that hold up well in lunchboxes.
7. Allergy swaps. This recipe works well with dairy-free milk (like almond or oat) and can be made nut-free depending on your mix-ins. You can also sub chia “eggs” for a plant-based version.
Keeping these quick facts in mind helps guarantee great results—and fewer breakfast battles!
Perfecting the Cooking Process
While the recipe is simple, a few small tweaks can make your oatmeal cups go from good to amazing. Here’s how to perfect the cooking process:
1. Stir the batter well. Even distribution is key. Make sure oats are fully soaked in the wet mixture to avoid dry patches after baking.
2. Use a cookie scoop or measuring cup. This keeps each muffin the same size, which ensures even cooking and prevents underbaked centers.
3. Watch the oven in the last 5 minutes. All ovens vary—check with a toothpick. If it comes out mostly clean (a few crumbs are fine), they’re done.
4. Don’t overbake. Overcooking makes them dry. They should be set on top but still soft and moist inside. Err on the side of slightly under rather than over.
5. Rotate the pan. At the halfway mark (around 12 minutes), rotate your muffin tin for even browning—especially helpful if your oven has hot spots.
6. Let them cool fully for storage. Trapping steam in a container will cause sogginess. Let cups cool completely before refrigerating or freezing.
Perfecting these small steps will guarantee fluffy, moist, and delicious oatmeal cups every time. Once you master the method, you can easily make this recipe your own!
Add Your Touch Back-to-School Baked Oatmeal Cups
One of the best parts of this baked oatmeal cups recipe is how easy it is to customize. Whether you’re cooking for picky eaters, trying to use up pantry ingredients, or just love switching things up, the options are endless.
1. Flavor Combos to Try:
Mix and match your add-ins to create different flavors in one batch! Here are a few fun ideas:
- Banana Chocolate Chip – Add ½ cup mini chocolate chips
- Apple Cinnamon – Fold in ½ cup finely chopped apples and a pinch of extra cinnamon
- Berry Blast – Use ½ cup of mixed berries (blueberries, raspberries, or strawberries)
- Peanut Butter Swirl – Add a teaspoon of peanut butter on top before baking and gently swirl with a toothpick
- Pumpkin Spice – Replace mashed banana with ½ cup pumpkin purée and add ½ tsp pumpkin spice
2. Make It More Nutritious:
Want to sneak in more nutrition?
- Add chia seeds or flaxseed meal (1–2 tbsp) for fiber and omega-3s
- Stir in shredded carrots or zucchini for extra veggies (great for picky kids)
- Use unsweetened almond milk or oat milk for a dairy-free option
3. Make It Dessert-Like (Still Healthy!):
Craving a sweet treat that doesn’t break your health goals? Add dark chocolate chunks, a touch of cinnamon sugar topping, or even a light drizzle of maple glaze after baking.
4. Fun for Kids:
Let your kids help! Set up a mini “topping bar” where they can add their favorite mix-ins to each muffin cup before baking. It gets them involved and makes breakfast more exciting.
Whether you’re going for fruity, nutty, or chocolatey, adding your own twist to these oatmeal cups keeps breakfast interesting and enjoyable day after day.
Storing & Reheating
One reason these baked oatmeal cups are such a back-to-school win? They store beautifully! A little prep on the weekend gives you grab-and-go breakfasts for the whole week—or even longer if you freeze them.
Warm up with this comforting favorite next.
Storing in the Refrigerator:
- Let the oatmeal cups cool completely after baking.
- Store them in an airtight container in the fridge for up to 5 days.
- Place a paper towel under the lid to absorb moisture and prevent sogginess.
Freezing Instructions:
- Cool completely, then place the cups on a baking sheet in a single layer to freeze for about 1 hour (flash freezing).
- Transfer to a freezer-safe bag or container. Label with the date.
- Store for up to 3 months.
- To prevent sticking, place parchment paper between layers.
How to Reheat:
- From the fridge: Microwave for 20–30 seconds or until warm.
- From frozen: Microwave for 45–60 seconds, or thaw overnight in the fridge and warm as needed.
- Optional: Wrap in foil and reheat in the oven at 350°F for 8–10 minutes for a crispier texture.
On-the-Go Tip: Wrap a few individually and keep in the freezer. Toss one into a lunchbox or backpack and it’ll thaw by mid-morning—perfect for snack time!
Having a stash of these oatmeal cups on hand means one less thing to worry about on those busy mornings—and your future self will thank you.
Chef’s Helpful Tips for Back-to-School Baked Oatmeal Cups
Even the simplest recipes can be taken to the next level with a few professional tricks. These helpful tips will make your Baked Oatmeal Cups tastier, easier to prep, and more enjoyable for the whole family.
1. Always Use Ripe Bananas
For the best natural sweetness and smooth texture, use bananas that have brown spots. If your bananas aren’t ripe enough, you can bake them in their peels at 300°F for 10–15 minutes to soften and sweeten them quickly.
Discover another cozy recipe that’s perfect for fall.
2. Don’t Overmix the Batter
Stir just until the ingredients are combined. Overmixing can result in dense oatmeal cups. A gentle stir ensures a moist, tender result every time.
3. Mix Up Your Batch
Want variety in one pan? Divide your batter into sections and mix in different toppings or flavors. For example: half with blueberries, half with chocolate chips.
4. Use a Silicone Muffin Pan or Liners
Oatmeal cups have a softer texture than muffins and can stick to metal pans. Silicone pans or good-quality liners make removal much easier and mess-free.
5. Sneak in Veggies for Picky Eaters
Grated carrots, zucchini, or even a spoonful of pumpkin purée can add nutrients without changing the flavor much. A smart trick for kids who don’t love vegetables.
6. Don’t Skip the Cooling Time
Let the oatmeal cups cool at least 10 minutes before removing them from the pan. This helps them set properly and hold their shape.
7. Add Crunch on Top
Sprinkle chopped nuts, seeds, or granola over the tops before baking for a crisp texture that contrasts with the soft interior.
These simple yet effective tips will make your baked oatmeal cups turn out perfect every time—whether you’re making them for yourself or a house full of hungry kids.

FAQ for Back-to-School Baked Oatmeal Cups
Can I make these baked oatmeal cups dairy-free?
Absolutely! Just swap out regular milk for your favorite non-dairy alternative like almond, oat, or soy milk. The texture stays soft and moist.
Are these gluten-free?
Yes, if you use certified gluten-free oats, this recipe is entirely gluten-free. Always check your oat brand to be sure.
Get more delicious one-pan meals right here.
Can I use steel-cut oats?
Not in this recipe. Steel-cut oats don’t absorb liquid the same way and will stay too hard. Stick with old-fashioned rolled oats for the best results.
What if I don’t have bananas?
You can substitute ½ cup of applesauce or pumpkin purée per 2 bananas. Keep in mind this may slightly alter the flavor and texture.
How sweet are these?
These oatmeal cups are lightly sweetened with maple syrup and banana. If you prefer a sweeter version, feel free to add an extra tablespoon of syrup or a few raisins.
Can kids help make these?
Yes! Kids can mash bananas, stir the ingredients, and choose toppings. It’s a fun and easy way to get them involved in the kitchen.
How long do they last?
Stored in the fridge, they last up to 5 days. In the freezer, up to 3 months. Reheat as needed and enjoy!
These answers should help troubleshoot common concerns and boost reader confidence when trying this recipe for the first time.
Conclusion
Back-to-school season doesn’t have to mean stressful mornings or skipped breakfasts. With these Delicious Baked Oatmeal Cups, you’ve got a reliable, nutritious, and totally customizable recipe that makes busy weekdays so much easier. They’re wholesome, freezer-friendly, and absolutely kid-approved—perfect for grabbing on the way to school, packing in lunchboxes, or enjoying with a quick cup of coffee before heading out the door.
By prepping a batch ahead of time, you’re not just making breakfast more convenient—you’re also setting a positive tone for the day. These cups are packed with fiber, energy-boosting ingredients, and enough variety to keep your mornings interesting all week long.
Plus, they’re incredibly flexible. Whether you love blueberry almond, banana chocolate chip, or cinnamon apple, there’s no wrong way to enjoy them. You can even get the kids involved in making their own versions, turning breakfast prep into a fun weekend activity.
So the next time you’re thinking about how to streamline your morning routine without sacrificing nutrition or taste, turn to this baked oatmeal cups recipe. It’s the kind of back-to-school comfort food that brings convenience, health, and flavor together in one perfect bite.
Give it a try, and don’t forget to share your favorite flavor combos in the comments below. Happy baking—and here’s to smoother mornings ahead!
Delicious Back-to-School Baked Oatmeal Cups Recipe for Easy Mornings
Description
These baked oatmeal cups are a quick, healthy, and portable breakfast option perfect for busy school mornings. Naturally sweetened with bananas and maple syrup, they’re customizable and freezer-friendly.
Ingredients
Instructions
Preheat oven to 350°F (175°C). Line a 12-cup muffin tin with liners.
In a bowl, mash bananas; whisk in eggs, milk, maple syrup, applesauce, and vanilla.
Stir in oats, baking powder, cinnamon, and salt until combined.
Fold in any optional mix-ins.
Divide batter evenly among muffin cups (~¾ full).
Bake 22–25 minutes until set and lightly golden.
Cool 10 minutes before removing from pan. Enjoy warm or store.
Notes
- Use ripe bananas for natural sweetness.
Swap milk for almond or oat milk for dairy-free.
Store cooled cups in an airtight container in fridge up to 5 days or freeze up to 3 months.
Reheat in microwave 30 seconds or oven at 350°F for 10 minutes.