
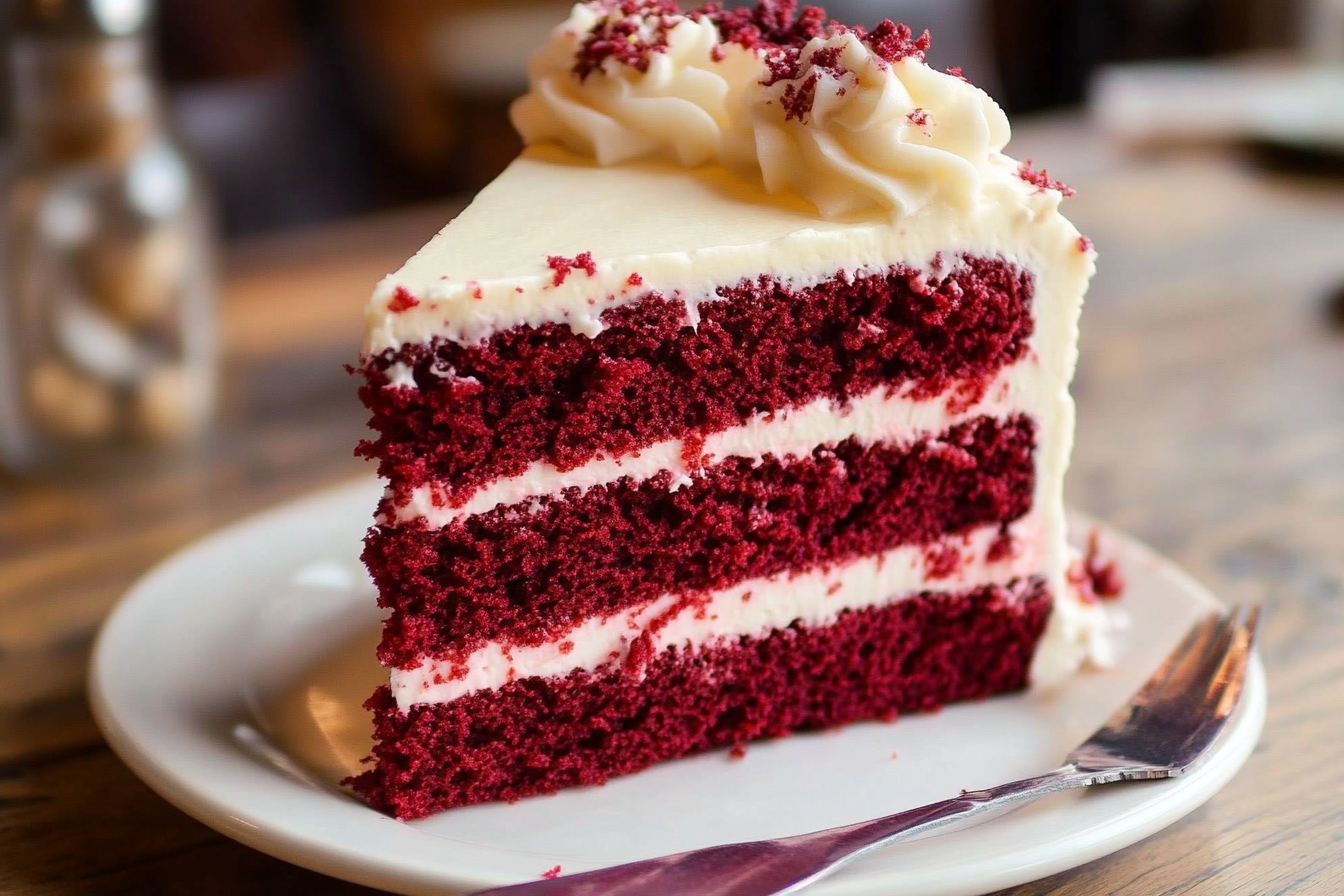

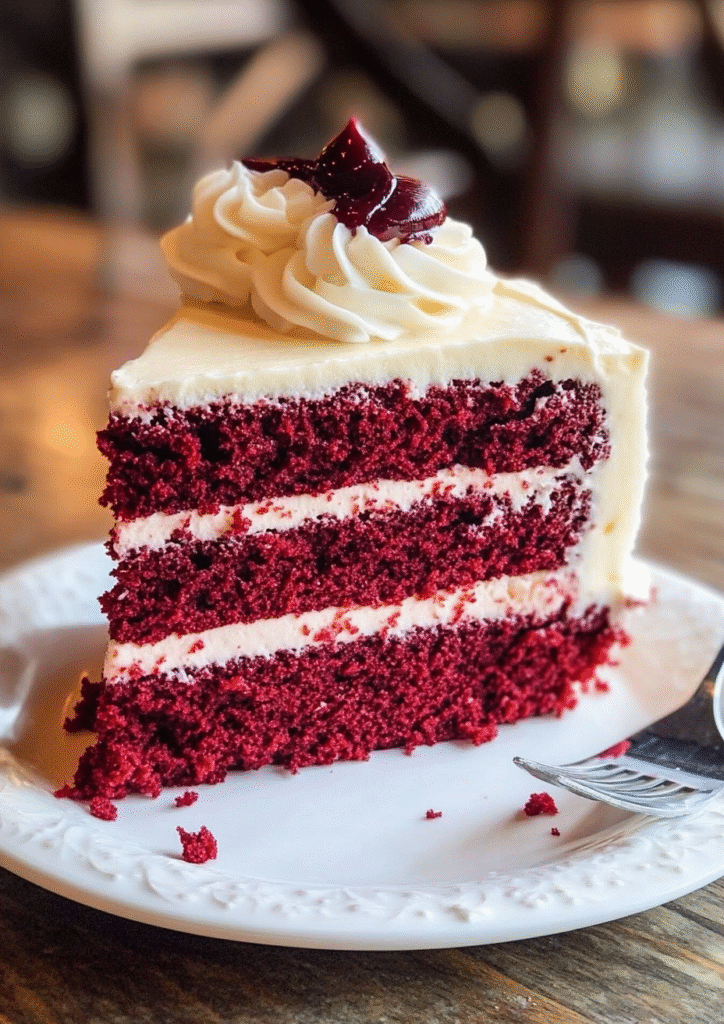
Few cakes can rival the timeless charm of a Classic Red Velvet Cake. With its vibrant red crumb, subtle cocoa flavor, and smooth cream cheese frosting, it’s both elegant and comforting. Unlike a bold chocolate cake or a plain vanilla sponge, red velvet sits beautifully in between—lightly chocolaty, tangy, and perfectly moist.
This cake has a history of celebration, often appearing at birthdays, holidays, and weddings. Its striking red layers paired with white frosting make it as eye-catching as it is delicious. Beyond looks, it delivers flavor and texture that keep people coming back.
In this post, we’ll cover everything you need—from ingredients to step-by-step instructions, plus tips for storage, reheating, and variations. Whether you’re baking for a special event or simply craving a nostalgic dessert, this Red Velvet Cake will become your go-to recipe.
Why You’ll Love This Classic Red Velvet Cake
Red Velvet Cake isn’t just pretty—it’s an experience. Here’s why you’ll love it:
- Balanced Flavor: Mild cocoa mixed with tangy buttermilk gives it depth without heaviness.
- Moist Texture: Buttermilk and oil create a tender, melt-in-your-mouth crumb.
- Cream Cheese Frosting: Tangy, rich, and smooth—this frosting makes every bite irresistible.
- Showstopping Look: Bright red layers and creamy frosting make it a centerpiece dessert.
- Tradition & Nostalgia: Loved for decades across the U.S., it brings warmth and familiarity to gatherings.
- Versatile: Perfect as a layered cake, cupcakes, or even a sheet cake for easy serving.
It’s the cake that balances taste, beauty, and tradition—making it ideal for holidays, birthdays, or simply when you want something special.
What You’ll Need
To make a truly classic Red Velvet Cake, you’ll need a mix of pantry staples and a few key ingredients that give it its unique taste and texture. Here’s the full list:
For the Cake:
- 2 ½ cups (310 g) all-purpose flour
- 1 ½ cups (300 g) granulated sugar
- 1 tsp baking soda
- 1 tsp salt
- 2 tbsp unsweetened cocoa powder
- 1 ½ cups (360 ml) vegetable oil
- 1 cup (240 ml) buttermilk, room temperature
- 2 large eggs, room temperature
- 2 tbsp red food coloring (liquid or gel)
- 1 tsp distilled white vinegar
- 2 tsp vanilla extract
For the Cream Cheese Frosting:
- 16 oz (450 g) cream cheese, softened
- ½ cup (115 g) unsalted butter, softened
- 4 cups (500 g) powdered sugar
- 2 tsp vanilla extract
📌 Tip: Always measure flour by spooning it into your cup and leveling it off—too much flour can make the cake dry.
How to Make Classic Red Velvet Cake
Baking Red Velvet Cake may look intimidating, but the process is straightforward if you follow these steps:
- Preheat the Oven
- Set oven to 350°F (175°C). Grease and line two 9-inch round cake pans.
- Mix the Dry Ingredients
- In a medium bowl, whisk flour, sugar, baking soda, salt, and cocoa powder until combined.
- Mix the Wet Ingredients
- In a large bowl, beat oil, buttermilk, eggs, food coloring, vinegar, and vanilla until smooth.
- Combine Wet and Dry
- Add dry ingredients into wet, mixing gently until batter is smooth (don’t overmix).
- Bake the Cakes
- Divide batter evenly between pans. Bake for 28–32 minutes or until a toothpick comes out clean.
- Let cool in pans for 10 minutes, then transfer to a wire rack.
- Prepare the Frosting
- Beat cream cheese and butter until fluffy. Add powdered sugar gradually, then vanilla. Mix until creamy.
- Assemble the Cake
- Place one cooled cake layer on a plate, spread frosting on top, then stack the second layer. Frost the outside and decorate as desired.
This method creates a soft, moist cake with just the right balance of cocoa and tang—exactly what makes red velvet so beloved.
You Must Know
Red Velvet Cake isn’t just “chocolate cake dyed red.” Its flavor comes from a mix of cocoa, buttermilk, and vinegar that creates a subtle tang and moist crumb. The red color is traditionally enhanced with food coloring, though the buttermilk and cocoa naturally give it a reddish hue.
The cream cheese frosting is just as important as the cake itself—it balances the sweetness and gives that signature finish. Using room-temperature ingredients and not overmixing the batter are two key rules for success.
Perfecting the Cooking Process
For best results:
- Room Temp Ingredients: They blend smoother and help the cake rise evenly.
- Don’t Overmix: Mix until just combined to keep the crumb tender.
- Pan Prep: Line pans with parchment for easy release.
- Check Early: Start testing for doneness at 28 minutes—overbaking dries it out.
- Cool Completely: Frost only once layers are fully cooled.
These small details make the difference between a good cake and a bakery-quality red velvet.
Add Your Touch Classic Red Velvet Cake
Red Velvet is a classic, but it also leaves room for creativity. You can:
- Cupcakes or Sheet Cake: Bake in cupcake tins or a single sheet pan for easy serving.
- Layer with Extras: Add a thin layer of fruit jam, chocolate ganache, or crushed cookies between layers.
- Decorate Differently: Sprinkle cake crumbs on top, pipe frosting swirls, or add fresh berries for color.
- Flavor Twist: A hint of orange zest or almond extract can subtly change the flavor without losing its essence.
Think of the base recipe as a canvas—you can keep it traditional or personalize it for holidays, birthdays, or casual gatherings.
Storing & Reheating
Discover more classic recipes here.
Red Velvet Cake stays moist if stored correctly:
- Room Temp: Covered, it lasts 2–3 days.
- Fridge: Keep in an airtight container for up to 5 days.
- Freezer: Wrap slices individually and freeze up to 2 months. Thaw overnight in the fridge.
For reheating, microwave a slice for 10–15 seconds—it brings back the soft texture and makes the frosting creamy again. Always cover the cake to prevent drying.
Chef’s Helpful Tips for Classic Red Velvet Cake
Pair this with an easy side dish.
- Use Gel Food Coloring: It gives a richer red without adding too much liquid.
- Weigh Your Flour: Too much flour = dry cake. Aim for 310 g (2 ½ cups).
- Don’t Skip the Vinegar: It reacts with cocoa + buttermilk for that classic flavor and tender crumb.
- Frost in Layers: Do a thin “crumb coat” first, chill, then apply the final frosting for a neat look.
- Slice with a Warm Knife: Dip in hot water, wipe, then cut for clean slices.
FAQ for Classic Red Velvet Cake
1. Can I make it without food coloring?
Yes—your cake will be more brownish-red, but flavor stays the same.
2. Can I use cake flour instead of all-purpose?
Yes, cake flour makes it even softer—just use 2 ¾ cups.
3. Is oil or butter better?
Oil keeps it moist longer, while butter gives richer flavor. A mix works well.
4. Can I make it ahead?
Yes, bake layers a day ahead and frost before serving. Store tightly wrapped.
5. Why did my cake turn out dry?
Most often it’s from overbaking or adding too much flour—stick to exact measurements.
Conclusion
Classic Red Velvet Cake is more than just a dessert—it’s a piece of American baking tradition. With its soft, moist crumb, gentle cocoa flavor, and tangy cream cheese frosting, it’s a cake that feels special every time you serve it. The bold red layers make it a showstopper, but its true charm is in the balance of flavors that never overwhelm, only delight.
Whether you bake it for holidays, birthdays, or simply a cozy weekend, this cake always delivers comfort and celebration in every bite. Once you master the simple steps and remember the key tips—like using room-temperature ingredients and not overbaking—you’ll have a go-to recipe that rivals any bakery.
Red Velvet isn’t just about looks. It’s about sharing a slice of nostalgia, creating new memories, and enjoying a cake that is as beautiful as it is delicious. Bake it once, and it may just become your family’s favorite tradition.
How to Make the Perfect Classic Red Velvet Cake at Home
Description
A moist and tender red velvet cake with a hint of cocoa, topped with rich cream cheese frosting. Perfect for holidays, birthdays, or any celebration.
Ingredients
Instructions
Preheat oven to 350°F (175°C). Grease and line two 9-inch round pans.
Mix flour, sugar, baking soda, salt, and cocoa in a bowl.
In another bowl, whisk oil, buttermilk, eggs, food coloring, vinegar, and vanilla.
Combine wet and dry ingredients until smooth (don’t overmix).
Pour into pans and bake 28–32 minutes, until a toothpick comes out clean. Cool completely.
For frosting: beat cream cheese and butter until fluffy. Add sugar and vanilla; mix until creamy.
Frost cooled cakes, layer, and decorate as desired.
Notes
- Use gel food coloring for a deeper red.
Do a thin “crumb coat” of frosting before final decorating.
Cake layers can be baked a day ahead and frosted later.