
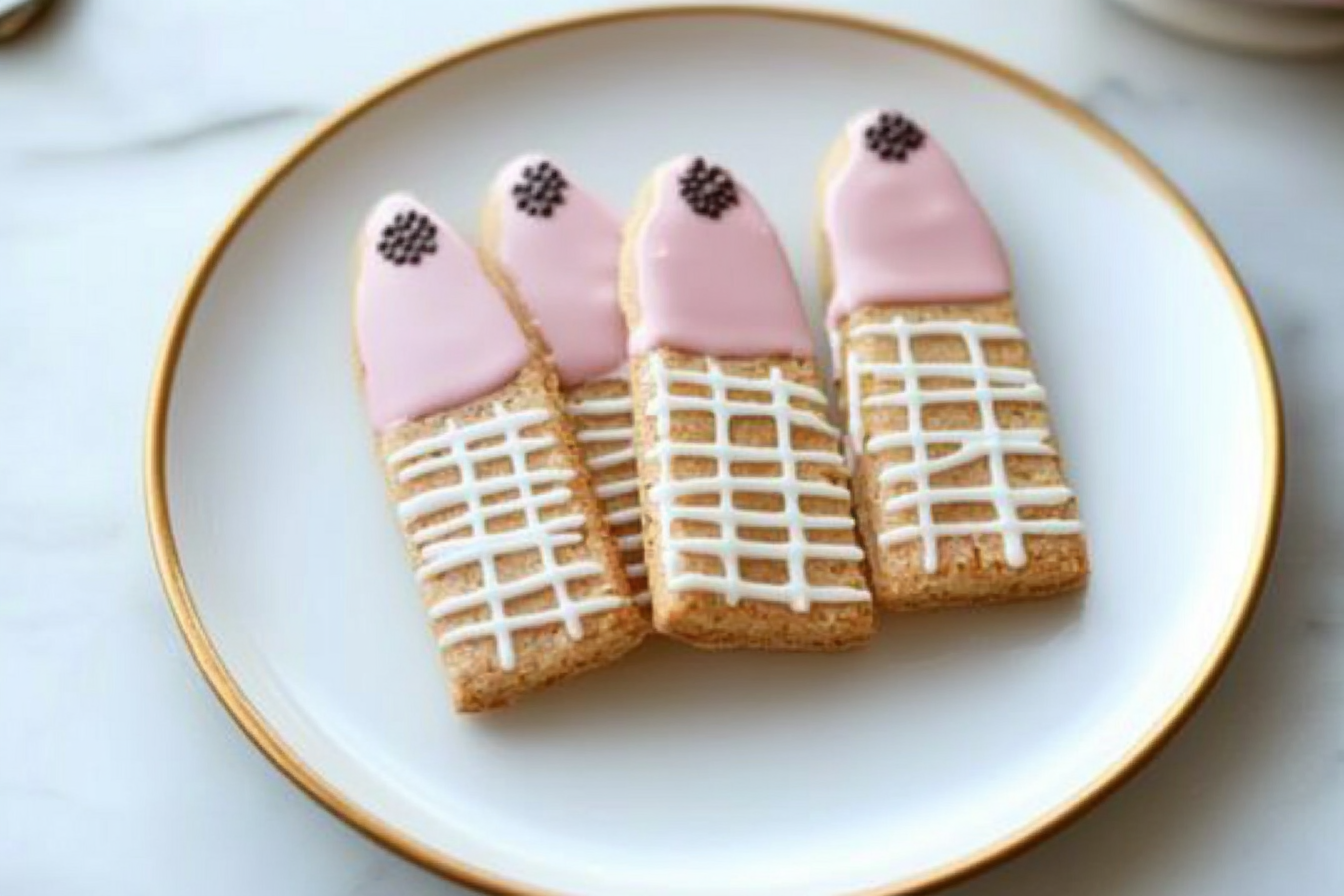

Back-to-school season calls for fun and festive treats—and these Cute Wafer Pencil Cookies are just the thing! Easy to make, no baking required, and absolutely adorable, they’re perfect for lunchboxes, school parties, or as a sweet “welcome back” for teachers. Shaped and decorated to look like real pencils, these cookies combine crunchy wafers, chocolate, and colorful candy melts for a creative snack that kids and adults will love.
This simple, hands-on recipe makes a great activity for kids and is fully customizable with your favorite colors and flavors. Whether you’re prepping ahead for a class celebration or just want to add a little joy to the first week of school, these pencil cookies are a smart (and sweet) choice.
Why You’ll Love This Wafer Pencil Cookies
These pencil cookies are more than just cute—they’re fun, fast, and flexible. With no baking needed, they’re great for busy families or last-minute treats. You’ll only need a few easy-to-find ingredients, and the decorating process is super kid-friendly.
They’re also perfect for party trays, teacher gifts, and back-to-school surprises. You can swap wafer flavors, change the candy colors, or make them nut- and gluten-free with simple adjustments. Best of all, they come together in minutes and store beautifully for several days—making them both practical and delightful.
What You’ll Need
Creating these Cute Wafer Pencil Cookies is super simple—you’ll only need a handful of ingredients, many of which you can find at your local grocery or craft store. Here’s what you’ll want to grab:
Ingredients:
- Vanilla wafer sticks – 1 pack (about 20 wafers)
- Pink candy melts – ½ cup (for the “eraser” end)
- Yellow candy melts or gel food coloring + white chocolate – ½ cup (for the pencil body)
- Mini chocolate chips – 20 pieces (for the pencil tips)
- White chocolate or white candy melts – ½ cup (for coating and assembly)
These ingredients come together to transform ordinary wafers into playful pencil-shaped cookies. Feel free to switch up the candy melt colors if you want to match school themes or holidays!
Tools:
- Microwave-safe bowls
- Small spoon or butter knife
- Parchment paper
- Optional: piping bag or zip-top bag (for cleaner lines)
That’s it! No oven, no fancy tools—just a few goodies and a little creativity.
How to Make Wafer Pencil Cookies
Making these pencil cookies is fast and fun. Here’s a step-by-step guide:
Step 1: Prep Your Space
Line a tray or baking sheet with parchment paper. This will keep the cookies from sticking as they cool.
Step 2: Create the “Eraser”
Melt ½ cup pink candy melts in the microwave in 20-second intervals, stirring until smooth. Dip one end of each vanilla wafer stick about ½ inch into the melted candy. Lay on parchment to set.
Step 3: Color the Pencil Body
Melt ½ cup yellow candy melts (or mix white chocolate with yellow food coloring). Spoon or dip the remaining wafer length (excluding the eraser end) into the yellow melt, leaving about 1 inch on the other end bare.
Step 4: Add the Pencil Tip
On the opposite end, use melted white chocolate to “glue” a mini chocolate chip (pointy side out) to form the pencil tip. Allow everything to set completely (about 10–15 minutes).
Step 5: Final Touches
Once set, you can go back with a little melted chocolate and clean up edges or add detail lines using a piping bag if you want to get fancy.
That’s it—easy, creative, and done in under 30 minutes!
You Must Know
Before you dive into making these Cute Wafer Pencil Cookies, here are a few key things to keep in mind for the best results:
- Use the right wafers: Choose wafer sticks that are crisp and not too fragile. Brands with a firm texture hold up better during dipping and decorating.
- Work in batches: Candy melts set quickly. Melt small amounts at a time so you can dip a few cookies without rushing. Reheat as needed.
- Color choice matters: If you can’t find yellow candy melts, melt white chocolate and tint it with oil-based or gel food coloring. Avoid using water-based food dye—it can cause the chocolate to seize.
- Mini chocolate chips are perfect pencil tips: They mimic the pencil point exactly, so don’t substitute regular-sized ones—they’ll look oversized.
- Cooling counts: Let the cookies rest on parchment paper or a silicone mat so they don’t stick. Don’t place them in the fridge unless your kitchen is very warm—sudden chilling can cause cracks in the coating.
This recipe is simple, but small details like the firmness of the wafer and the consistency of the melts can make a big difference in presentation and ease.
Perfecting the Cooking Process
Even though this is a no-bake treat, a few extra tips can take your pencil cookies from fun to flawless:
- Stir melts until smooth: Heat candy melts or white chocolate in short bursts (15–20 seconds at a time) and stir often. Overheating can make the texture grainy or lumpy.
- Control the dip depth: Only dip about ½ inch of the top for the “eraser” and around 2–3 inches for the “pencil body.” Keeping parts uncovered adds contrast and keeps hands clean when eating.
- Let each layer set: Don’t rush the process. Allow each part to harden before moving on to the next step, especially when applying the tip or adding decorative lines.
- Use parchment, not foil: Foil can stick to candy coatings. Parchment or wax paper is the best surface for cooling the cookies.
- Keep extras nearby: Have extra wafers and chips on hand in case a few break or melt unevenly. It’s always good to make a few more than you need.
Once you’ve made these a time or two, you’ll be able to whip up a batch with precision and ease—and they’ll look like they came straight from a bakery!
Add Your Touch Wafer Pencil Cookies
One of the best things about these Cute Wafer Pencil Cookies is how customizable they are. With just a few tweaks, you can make them match any theme, event, or personality:
- School Spirit: Use your child’s school colors instead of classic yellow. Swap the candy melts to represent school pride or even team colors for sports events.
- Flavor Variations: Not a fan of vanilla? Try chocolate or strawberry wafers instead. You can even dip them in mint-flavored chocolate or drizzle with caramel for a more grown-up twist.
- Creative Decorations: Use edible markers or piping gel to draw a line around the “ferrule” (the metal part that connects the eraser) or write the child’s name on the side of the “pencil.” It’s a small detail that adds a big wow factor.
- Make it a kit: Turn this recipe into an activity! Pre-melt candy, sort decorations into cups, and let kids decorate their own “pencil” cookies. It’s a great idea for classroom parties, birthday activities, or playdates.
- Theme it up: Hosting a back-to-school bash? Pair these cookies with apple cupcakes, notebook-themed brownies, or chalkboard cookies for a full edible school supply set!
Don’t be afraid to get creative. Whether you’re going for cute, classy, or completely wacky, these wafer pencils can easily match your style.
Storing & Reheating
These no-bake pencil cookies are easy to store and hold up well for several days, making them perfect for prepping ahead:
You’ll love how easy this recipe is—just like this one here.
How to Store:
- Room Temperature: Keep cookies in an airtight container at room temp for up to 5–7 days. Layer them with parchment or wax paper to avoid sticking or smudging.
- Avoid humidity: High humidity can soften the wafers and cause the chocolate to sweat. Store them in a cool, dry spot for best results.
- Freezing: While it’s not ideal to freeze decorated pencil cookies (as it can affect the candy coating), you can freeze undecorated wafers in a sealed container and decorate them later when ready.
Reheating (if needed):
- These cookies don’t require reheating, but if you need to re-melt your candy coating during the process:
- Use the microwave in 15-second intervals, stirring each time until smooth.
- Avoid overheating—it can cause the chocolate to seize or become gritty.
These treats are sturdy enough to transport to school or events without falling apart—just pack them with care and avoid direct heat or sunlight.
Chef’s Helpful Tips for Wafer Pencil Cookies
Want your wafer pencil cookies to turn out picture-perfect every time? Here are a few tried-and-true tips straight from the kitchen to help you get flawless results:
Here’s another no-fail recipe to add to your collection.
- Chill your wafers briefly: Before decorating, pop the wafers in the fridge for about 5–10 minutes. This helps firm them up and prevents them from breaking when dipping into warm melts.
- Use a tall, narrow cup for dipping: If you’re coating multiple cookies quickly, melt your chocolate in a small, deep cup to make dipping easier and more precise.
- Work with room-temp candy melts: Let melted candy sit for a minute before dipping. If it’s too hot, it may melt or warp the wafers. Slightly cooled (but still smooth) chocolate gives a cleaner coat.
- Don’t over-dip: It’s tempting to fully submerge, but dip only the ends—this keeps them neater and more pencil-like. Use a spoon to guide the coating where needed.
- Use tweezers for detail: For perfectly placed mini chocolate chips or decorations, use kitchen tweezers. They offer more control and reduce the chance of smudging.
- Double-dip if needed: If your candy coating looks thin or uneven, wait a few minutes and dip a second time for a smoother finish.
- Dry completely before storing: Let cookies set for at least 15–20 minutes before transferring to containers. Rushing this step can lead to sticky, smudged surfaces.
These small adjustments make a big difference when it comes to presentation and structure. With a little patience and planning, even beginner bakers can create a batch that looks totally professional!

FAQ for Wafer Pencil Cookies
Can I use different types of wafers?
Yes! You can use chocolate, strawberry, or even gluten-free wafers. Just choose a firm, stick-style wafer that won’t crumble when dipped.
What if I can’t find candy melts?
You can substitute with white chocolate chips or almond bark, then add gel-based food coloring. Just avoid water-based food dye, as it can ruin the texture.
This pairs perfectly with one of our top-rated side dishes.
How far in advance can I make these?
These cookies are best within 3–5 days of decorating. You can make them ahead and store them in an airtight container at room temperature—just keep them out of direct heat and sunlight.
Can kids help with this recipe?
Definitely! This is a great kid-friendly activity. Kids can dip, decorate, and even personalize their own “pencil” cookie. Just be sure an adult handles the melting process.
Are these cookies nut-free?
Yes—if you choose nut-free wafers and melts. Always double-check labels to ensure the ingredients are safe, especially for classroom or allergy-friendly treats.
Do these travel well?
Yes! Just layer them between wax paper in a sturdy container. They’re perfect for bake sales, school parties, or gifting to teachers.
Got more questions? Drop them in the comments section of the blog—we’re happy to help make your back-to-school baking a breeze!
Conclusion
Whether you’re gearing up for the first day of school, packing a sweet surprise in your child’s lunchbox, or simply celebrating the start of a new academic year, these Cute Wafer Pencil Cookies are a delightful way to do it. They’re easy, affordable, and irresistibly charming—perfect for busy parents, classroom parties, or even thoughtful DIY teacher gifts.
This no-bake treat proves that you don’t need fancy tools or professional skills to create something that looks amazing and brings smiles all around. With just a few simple ingredients and a little creativity, you can transform ordinary wafer sticks into colorful pencil-themed cookies that everyone will love.
Plus, this recipe is fun for all ages. Kids can help decorate, making it a hands-on kitchen activity that doubles as a learning moment. You can customize the colors, flavors, and details to suit any style or event, whether it’s school-themed, party-themed, or holiday-theme
Make Back to School Special with These Cute Wafer Pencil Cookies
Description
These adorable wafer pencil cookies are the perfect no-bake treat to celebrate back-to-school season! Made with crisp wafers, melted chocolate, and a bit of creativity, they look like little pencils and are ideal for lunchboxes, class parties, or after-school snacks. Quick, easy, and fun to make with kids!
Ingredients
Instructions
Melt white and pink candy melts in separate bowls using the microwave (30-second intervals, stir until smooth).
Dip one end of each wafer cookie into the pink melts to create the eraser. Let set.
Trim one end of the wafer to a point (gently slice with a knife).
Dip the pointed end into white melts, then press a mini chocolate chip at the very tip to resemble the pencil point.
Let all decorated wafers rest on parchment paper until firm (about 10 minutes).
Notes
- Use gluten-free wafers for an allergy-friendly option.
Add school colors by using different colored candy melts.
Store in an airtight container at room temperature for up to 5 days.
This is a no-bake recipe, so kids can safely help decorate!