

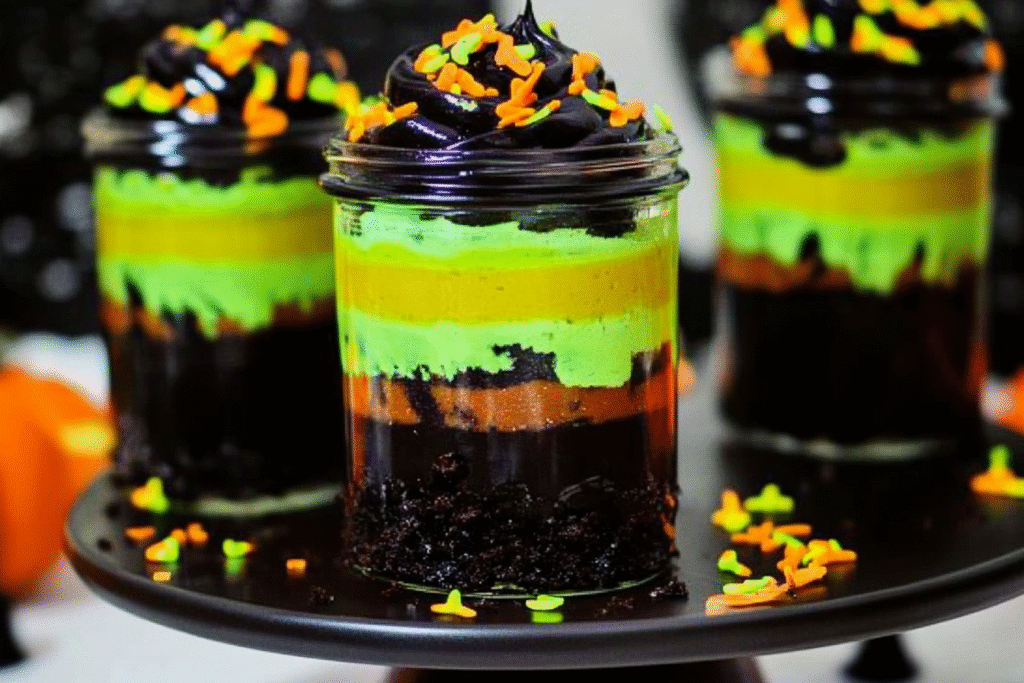
Halloween is the perfect time for spooky, fun desserts, and Witches’ Brew Halloween Cake Jars are just that! These jars combine layers of moist cake, creamy frosting, and playful decorations into a portable, mess-free treat. With vibrant layers and eerie toppings like candy eyes, chocolate “witch fingers,” or edible glitter, each jar looks like a mini bubbling cauldron.
Perfect for parties, classroom events, or gifts, these cake jars are easy to make ahead of time and impress every guest. In this guide, we’ll show you how to create these magical jars step by step, from ingredients to decoration, so you can bring Halloween magic to your kitchen.
Why You’ll Love This Witches’ Brew Halloween Cake Jars
These cake jars are as fun to make as they are to eat. They’re customizable with flavors like chocolate, vanilla, pumpkin, or red velvet, and each jar is a convenient single serving—perfect for parties or gifts. Decorating is a creative activity for the whole family, with spooky toppings and colorful layers that wow both kids and adults.
Plus, you control the ingredients, so they can be allergy-friendly or made healthier with natural colors or dairy-free options. From their fun appearance to delicious taste, Witches’ Brew Halloween Cake Jars deliver a magical dessert experience everyone will enjoy.
What You’ll Need
To make your Witches’ Brew Halloween Cake Jars, you don’t need fancy ingredients—just basic baking staples and a few festive extras. Here’s what you’ll need for about 6 jars:
Cake Layers:
- 1 box of chocolate or vanilla cake mix (or homemade equivalent)
- Ingredients listed on the cake mix box (usually eggs, oil, and water/milk)
Frosting:
- 1 cup unsalted butter, softened
- 3–4 cups powdered sugar
- 2–3 tablespoons milk (or non-dairy milk)
- 1 teaspoon vanilla extract
- Food coloring (green, purple, or orange for a spooky look)
Decorations:
- Candy eyes, gummy worms, or Halloween-themed candies
- Edible glitter or sprinkles
- Chocolate sticks or “witch fingers” (store-bought or homemade)
Tools:
- 6 clean mason jars (8 oz each)
- Mixing bowls, spatula, piping bags (optional)
These ingredients are easy to find at any grocery store and allow plenty of creativity when layering flavors, colors, and decorations. You can even swap flavors—pumpkin spice, red velvet, or funfetti are all perfect for a Halloween twist.
How to Make Witches’ Brew Halloween Cake Jars
- Bake the Cake: Preheat your oven according to the cake mix instructions. Prepare the cake batter as directed. Pour into a greased 9×13 pan and bake until a toothpick comes out clean. Let it cool completely.
- Prepare the Frosting: In a large bowl, beat 1 cup softened butter until creamy. Gradually add 3–4 cups powdered sugar, alternating with 2–3 tablespoons milk, until smooth. Add 1 teaspoon vanilla and divide the frosting into separate bowls to mix food coloring for your “witch’s brew” effect.
- Assemble the Jars: Crumble the cooled cake into small pieces. Start layering in each jar: 2–3 tablespoons cake, then a layer of frosting, repeating until the jar is nearly full. Leave some space at the top for decorations.
- Decorate: Add candy eyes, edible glitter, sprinkles, or chocolate sticks to make your jars look spooky and fun. You can pipe frosting on top for a bubbling cauldron effect.
- Serve or Store: These jars can be served immediately or stored in the fridge for up to 5 days.
You Must Know
Before you dive into making Witches’ Brew Cake Jars, there are a few helpful things to keep in mind. First, cooling the cake completely before layering is key—warm cake will melt the frosting and make the layers messy. Second, using gel food coloring instead of liquid gives you bold Halloween colors without watering down your frosting. Third, jars make portion control easy, but don’t overfill—leave a little space at the top so you can seal or decorate without spilling.
Another tip: store-bought cake mix and frosting work perfectly fine, but if you want a richer flavor, homemade recipes can really elevate the dessert. Lastly, remember that presentation matters. These jars are as much about the look as the taste, so take a little time to add creepy-cute toppings that make them stand out on your Halloween table.
Perfecting the Cooking Process
The magic of this recipe lies in the layers, so focusing on texture and balance will make your jars perfect every time. When baking the cake, avoid overmixing the batter—it can make the cake dense instead of light and fluffy. Once baked, crumble the cake into even chunks rather than fine crumbs; this gives each spoonful a nice texture.
For the frosting, smooth layers are great, but swirls of different colors look especially spooky and fun. A piping bag makes layering easier, but even a spoon will do the trick. Think of it as building a potion—each ingredient adds character, so alternate colors and toppings for the best visual effect.
Lastly, don’t rush assembly. Let each layer settle slightly before adding the next. This prevents squishing and helps the jars look neat. With just a little patience, you’ll have Halloween jars that are festive, delicious, and absolutely show-stopping.
Add Your Touch Witches’ Brew Halloween Cake Jars
One of the best things about Witches’ Brew Cake Jars is how easy they are to customize. You can swap flavors, colors, and toppings to make them uniquely yours. Love chocolate? Use a fudge cake base and add chocolate chips between layers. Want a brighter look? Try neon-colored frosting and edible glitter for a magical shimmer. Kids often enjoy adding their favorite candies—like candy corn, gummy bats, or even mini marshmallows shaped like ghosts.
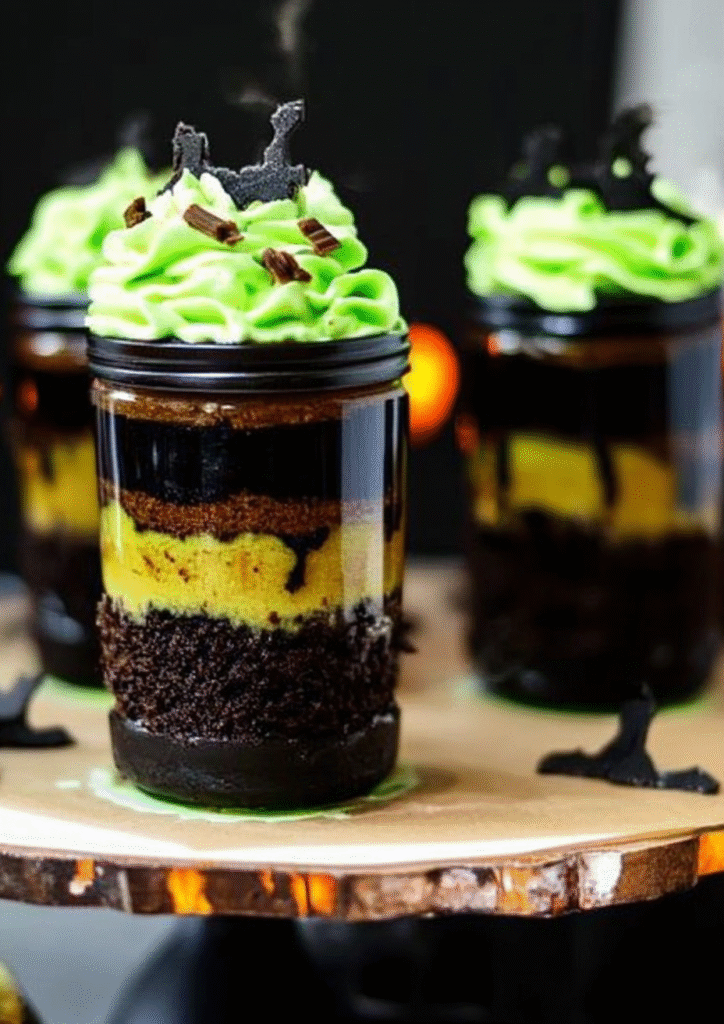
You can also theme the jars for different Halloween vibes. For a “witch’s cauldron,” use green frosting with bubbling candy pearls on top. For a spooky graveyard, layer chocolate cake with crushed cookies and top with candy tombstones. For a fun family activity, set out toppings in bowls and let everyone design their own jar—it’s a Halloween craft and dessert all in one!
Storing & Reheating
These jars are not only fun to make but also easy to store. Once assembled, cover each jar with a lid or plastic wrap and refrigerate for up to 3–4 days. The cake stays moist, and the frosting keeps its texture. If you want to prepare in advance, bake and crumble the cake a day ahead, then assemble just before serving.
Since this is a chilled dessert, there’s no real reheating needed. Simply let the jars sit at room temperature for about 15 minutes before serving to soften the frosting slightly. If you prefer them cold, serve straight from the fridge—they taste great both ways! For longer storage, you can freeze the cake crumbles for up to a month and defrost when ready to assemble fresh jars.
Chef’s Helpful Tips for Witches’ Brew Halloween Cake Jars
To make your Witches’ Brew Halloween Cake Jars even better, keep these pro tips in mind:
- Work in layers – Use a spoon or piping bag for neat frosting swirls. Alternating colors makes the jars look magical.
- Texture is key – Combine soft cake, creamy frosting, and crunchy toppings like cookies or candy. This makes every bite exciting.
- Use clear jars – Transparent jars show off the layers, making them instantly eye-catching at parties.
- Don’t overfill – Leave a little space at the top so lids close easily, and toppings don’t spill.
- Get kids involved – Let them choose decorations—it turns dessert-making into a fun Halloween activity.
Small details like these turn your cake jars from simple to show-stopping, making them the star of your Halloween table.
FAQ for Witches’ Brew Halloween Cake Jars
Q: Can I make these jars ahead of time?
Yes! You can bake the cake a day in advance, then assemble the jars the next day. They keep well in the fridge for up to 3–4 days.
Q: Do I need mason jars?
No. Any clear jar or cup works. Plastic jars are great for kids’ parties since they’re safe and disposable.
Q: Can I use other cake flavors?
Absolutely. Vanilla, red velvet, funfetti, or even carrot cake all work great. Just match the frosting and toppings to your theme.
Q: Are these freezer-friendly?
You can freeze cake crumbles for a month, but it’s best to assemble jars fresh for the best look and texture.
Q: How do I make them extra spooky?
Add candy eyeballs, gummy worms, or use black frosting for a darker, witchy vibe. Edible glitter also adds a magical touch.
Conclusion
Witches’ Brew Halloween Cake Jars are more than just a dessert—they’re a fun experience that brings the spirit of Halloween straight to your table. With layers of moist cake, creamy frosting, and playful toppings, every spoonful feels like a taste of spooky magic. They’re easy to assemble, endlessly customizable, and a guaranteed crowd-pleaser for both kids and adults. Whether you’re hosting a big Halloween bash, preparing classroom treats, or simply creating a festive dessert for family night, these jars check all the boxes: tasty, eye-catching, and easy to serve.
What makes them truly special is the creativity they inspire. You can go classic with chocolate and orange, whimsical with neon colors, or creepy with candy worms and “dirt” cookie crumbs. Each jar becomes its own little cauldron of Halloween fun, allowing you to tailor them to your party’s vibe. Best of all, the recipe is simple enough for beginners but flexible enough for seasoned bakers to showcase their skills.
So this Halloween, skip the ordinary desserts and brew up something unforgettable. These cake jars are sure to spark smiles, conversations, and maybe even a little bit of Halloween magic. Once you try them, they’ll quickly become a tradition you’ll look forward to making year after year.
How to Make Witches’ Brew Halloween Cake Jars for Parties
Description
Spooky, fun, and layered, these Witches’ Brew Halloween Cake Jars are perfect for parties, kids, or a festive dessert table. Each jar is a magical mix of cake, creamy frosting, and Halloween-themed toppings.
Ingredients
Instructions
Bake the cake: Prepare mix as per instructions, bake at 350°F for 25–30 min, let cool completely.
Prepare frosting: Divide into bowls, tint with gel colors.
Assemble jars: Crumble cake, layer with frosting in jars, repeat.
Decorate: Top with crushed cookies, candy worms, candy eyes, and optional glitter.
Serve: Chill 15 minutes or enjoy immediately.
Notes
- Make sure cake is fully cooled before layering to prevent frosting from melting.
Use gel food coloring for vibrant frosting without thinning.
Jars can be prepped ahead and stored in the fridge for up to 3–4 days.
Kids love helping with layering and decorating—great family activity!